Today I upgraded my late 2011 MacBook Pro from 4gb RAM to 8gb using a Crucial 2x4gb kit (model #CT2CP51264BC1339). Now, Apple provides a tutorial for this here. However, when I got started, I quickly discovered that they’ve left a decent amount out, probably in the interests of getting more people to pay them for overpriced RAM and service. I love Apple, really I do, but sometimes they’re kind of…irritating. So I’m dubbing this:
How to replace RAM in a late 2011 MacBook Pro: The Better Instructions
- Purchase your RAM. I selected Crucial as a dependable and respected brand. There were several kits that would have worked for this particular MacBook, but I went with model #CT2CP51264BC1339 (it’s worth noting that some modules have multiple model numbers for the same module. Crucial’s website was a bit confusing, but their IM assistant was helpful in selecting the appropriate RAM for my late 2011 MacBook Pro). Here’s my RAM in package:
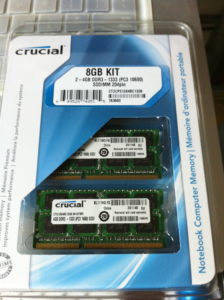
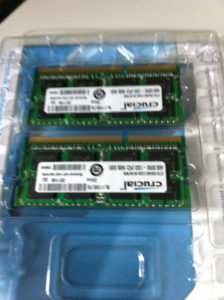
- Shut down your computer and disconnect all the various wires you may have attached to it (power, drives, peripherals). Apple says to wait a few minutes if you’ve been using it to let the insides cool, but that’s not going to be necessary in the real world. You’ll see why in a minute.
- Once it’s all shut down, flip the computer upside down like a sad turtle.
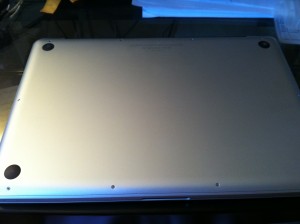 There are 10 screws on that bottom panel, three of which are long. The long ones are the three top right screws (along the long side) in this image (the open side of the computer is facing me). Apple says you need to keep track of where they go…I don’t think there’s a snowball’s chance you could put them back in wrong, but the short ones are TINY so…don’t lose them.
 - Now comes the hardest part of upgrading your MacBook Pro’s RAM. Getting the screws out. Turns out, they’re actually semi-glued in place with some blue substance. You will need about a #0 or #00 screwdriver to get them out, and it will take way more force than you’d expect due to the glue stuff. I broke a screwdriver and ended up having to use pliers to hold the broken end of the screwdriver and use most of my hand strength to remove all the screws. This will almost certainly take you long enough to do that you won’t have to worry about the innards being warm once you get in there.
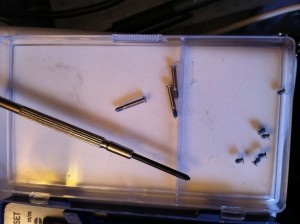
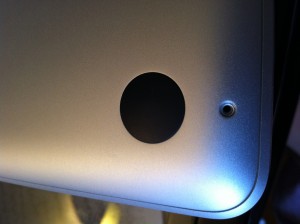
- Once all the screws are removed, Apple’s instructions just say “remove the case”. Thanks, Apple. In my case (harrrr), the case WOULD NOT come off and I was afraid of bending it. Turns out, there are two little clips inside the case, along the center line (basically midway between each set of the side screws of the long sides, smack in the middle of the case). One of mine was stuck. It took an alarming amount of wiggling to get it unhooked, and since I didn’t know what I was trying to detach, I was concerned about breaking something in the process. Now you know: there’s clips in there. You may have to unhook them via wiggling.
- Once the case is off, things get pretty straightforward (assuming you’ve done any RAM upgrades before).
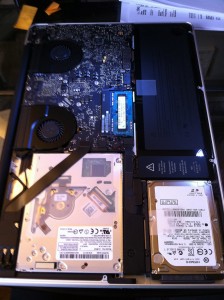 Touch something metal inside there to discharge static. Then push back the two clips to either side of the RAM module (green with a sticker on it, smack in the middle of the innards. It should pop up.
 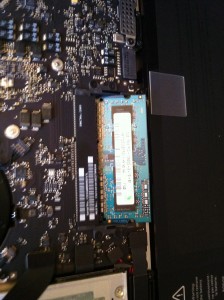 Just gently wiggle it out and set it aside. Then push back the clips again, and the second module will pop up to where you can reach it. Wiggle that one out too, and set it aside. Here’s the empty bay:
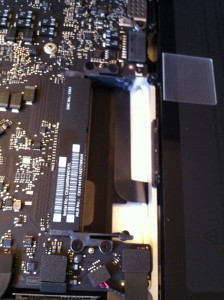
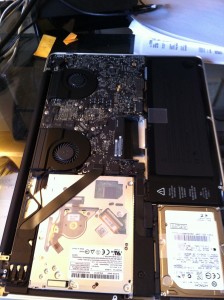
- Now get the new modules out of the packaging carefully, without touching the gold bits. Try to handle them by the edges. Slide the first one into the bottom slot of that now-empty bay like so:
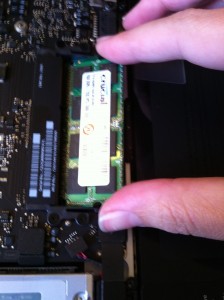 Make sure it’s in all the way (you shouldn’t be able to see the gold edges much if at all) and then press it down fairly firmly like so:
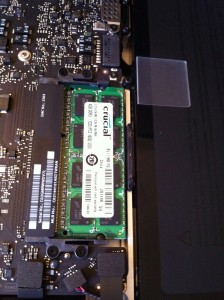
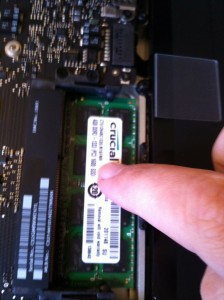 Repeat this process with the second module in the upper slot. For me, this one took a bit more wiggling to seat properly. The inside of a computer looks delicate, but in my experience they can handle a decent amount of pressure. Just don’t force anything or push past where things start to flex. Here’s the newly seated 8GB of RAM:
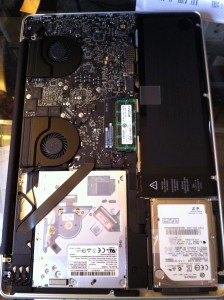
- Basically if they fit in their spot, they’re in right. So now we close it back up. This is waaaaaaaay easier than opening. Set the case back in place on your MacBook Pro, place your screws and screw them down firmly. I did each corner, then the sides alternating, but I’m not sure that’s necessary. Remember, though, that the long screws go on the side by the fans.
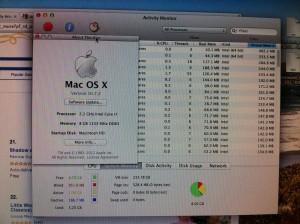
- Flip your MacBook Pro back over, hook up your power, and turn it back on. Mine took a bit longer than usual to boot but I wasn’t timing it. I’ve replaced RAM in 3 different models of Apple laptops now, and I’ve never had any trouble with them, but I assume that if you have any issues getting restarted your first step should be to shut it back down, crack open the case and make sure your RAM is really seated properly. I checked my system profiler to be sure and yup, 8gb RAM recognized! As I’m writing this, my MacBook Pro is happily making use of 5.5gb of that RAM!
I hope you found this MacBook RAM upgrade tutorial helpful! Apple’s instructions definitely leave something to be desired in terms of detail, so while I definitely recommend reading them, I ended up Googling around when the Apple version wasn’t quite sufficient.
If this helps you, please share it with others! Google +1 or Like this post and make this website improver super-happy!
More How-To:
Want to know about something else? Submit a question to my Q&A section by filling out the contact form here.
